How to Create a Campaign
How to Create a Campaign
Campaigns are the core of your agency operations. This guide walks you through creating a campaign using the four-tab creation flow in Circle Club.
Getting Started
- Navigate to Campaigns
- Click the "New Campaign" button in the top-right corner
- This opens the campaign creation page at
/campaigns/createwith four tabs
To create a campaign with minimum required information, you'll need to complete the Overview tab. However, you can add additional details across all four tabs to fully configure your campaign.
Tab 1: Overview
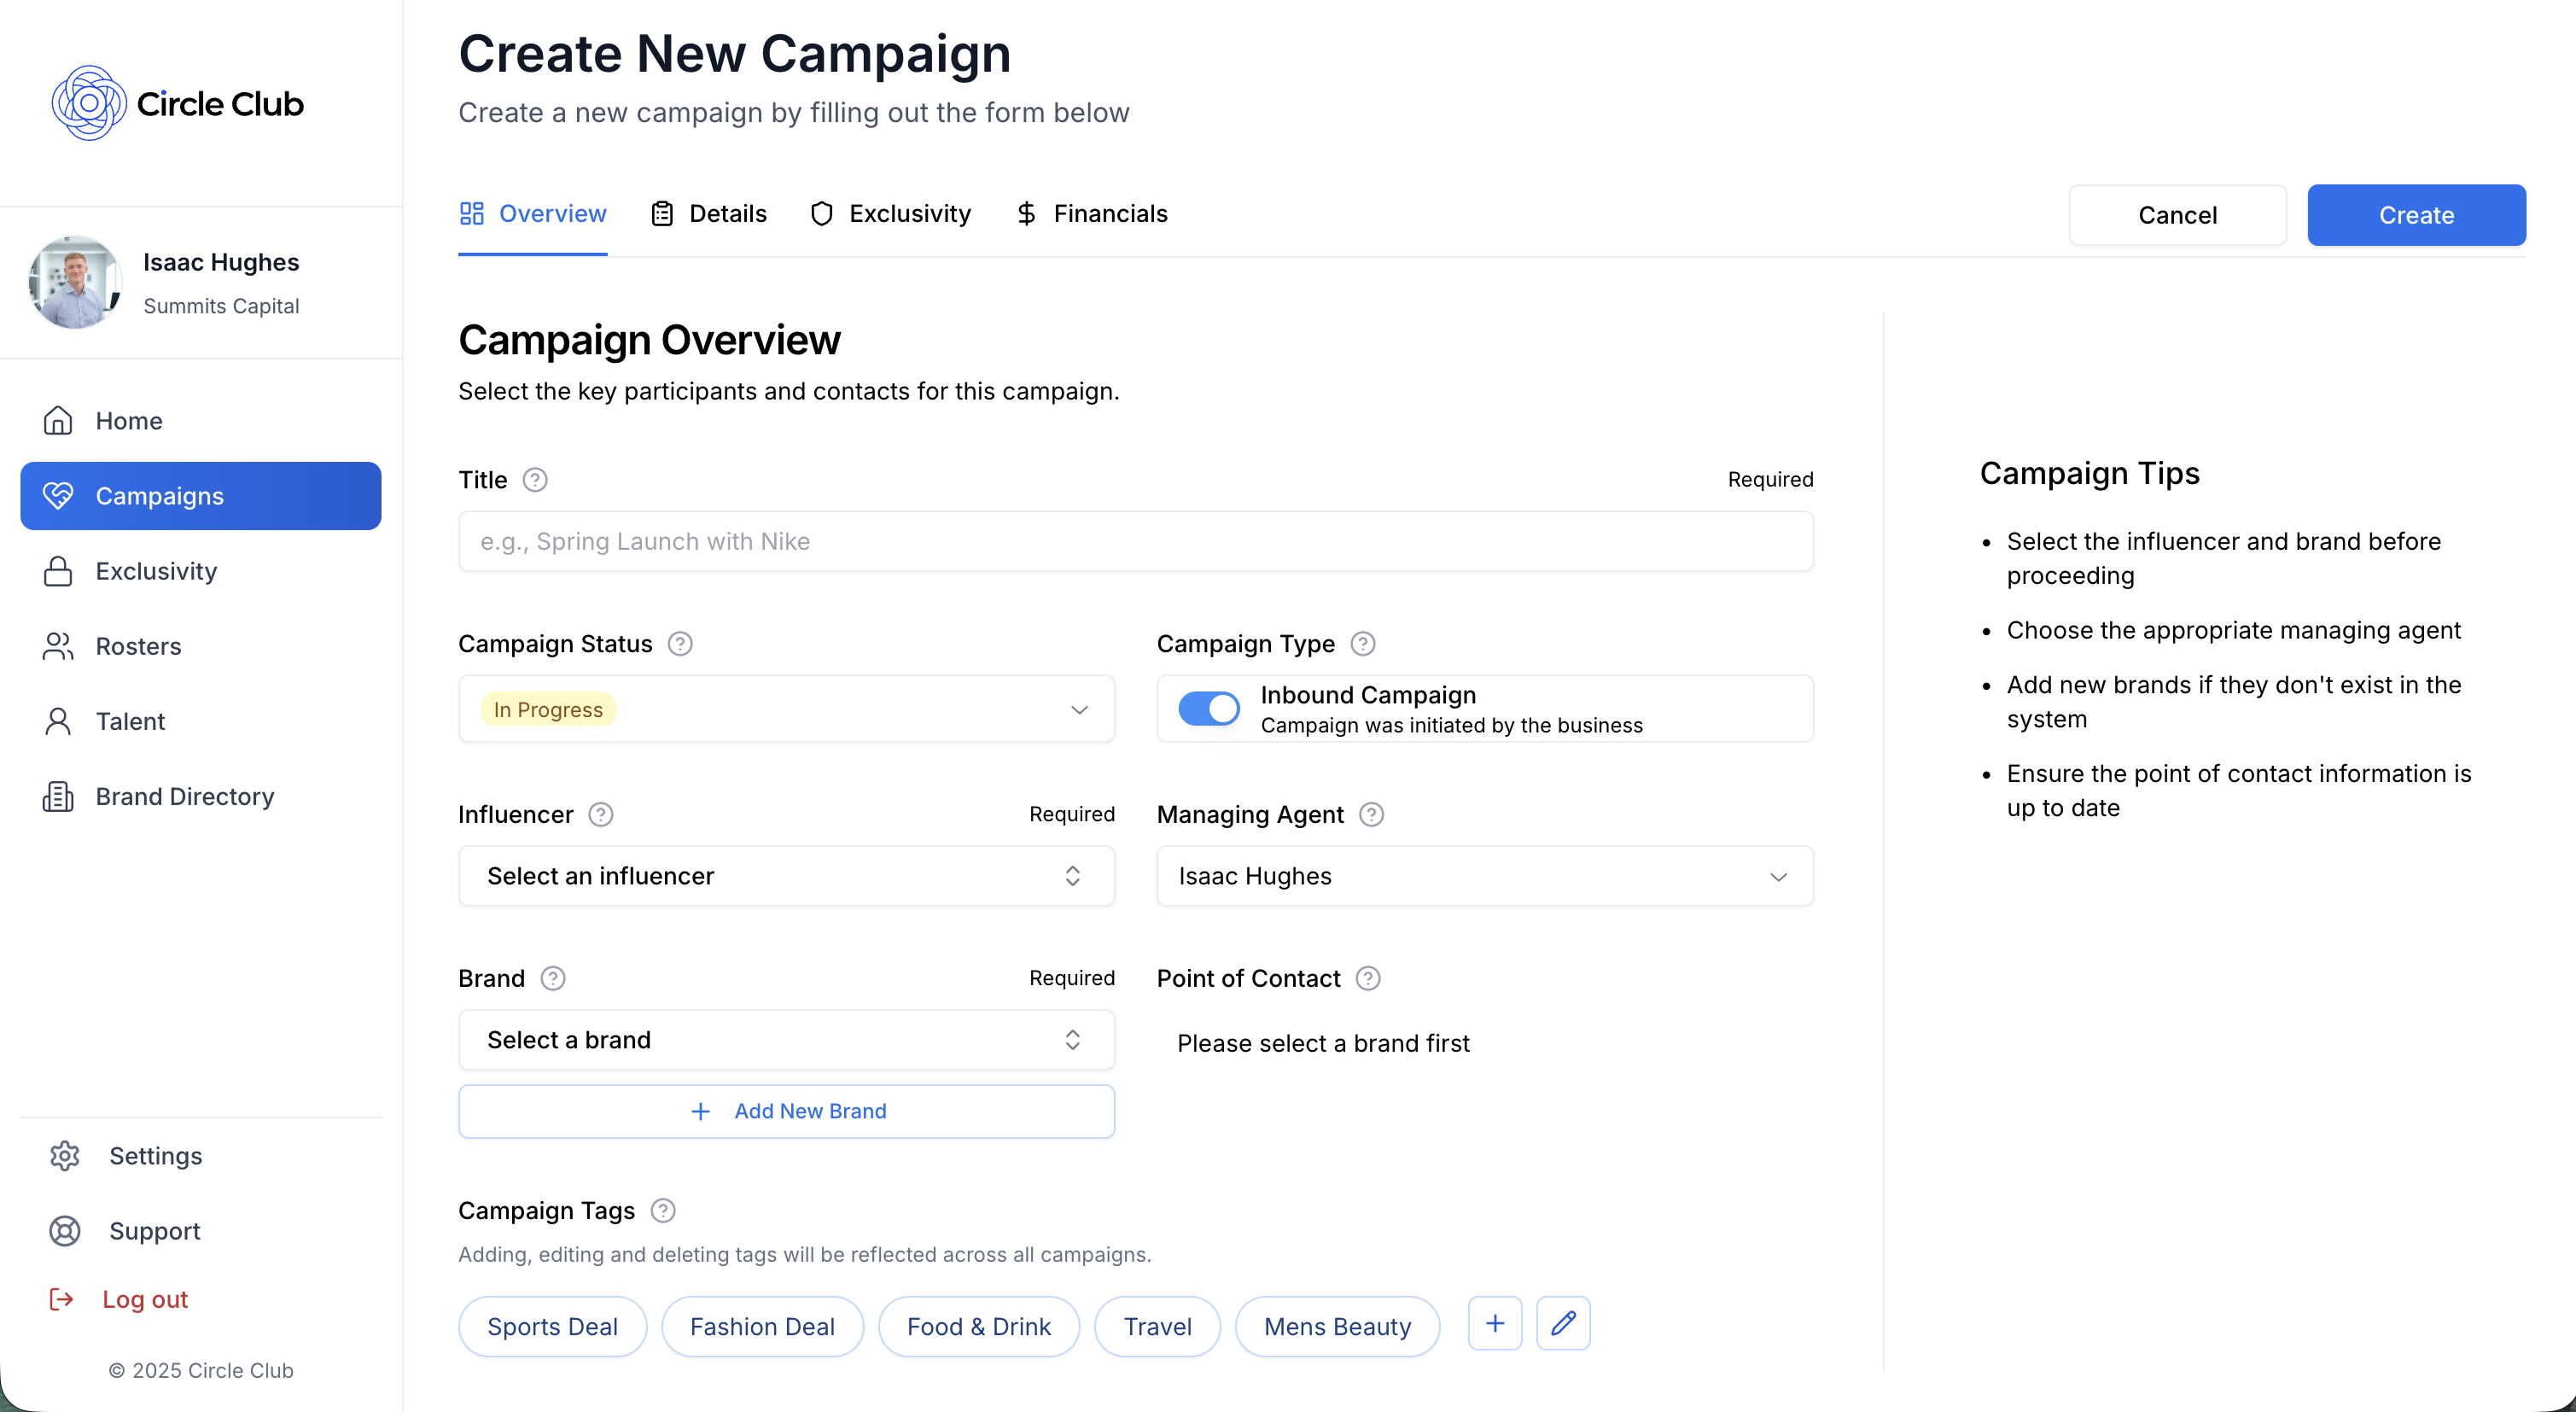
The Overview tab contains the essential information needed to create a campaign.
Required Fields
- Title: Enter a clear, descriptive name for your campaign
- Influencer: Select the influencer for this campaign
- Managing Agent: Select the talent manager who will manage this campaign
- Brand/Customer: Select or add the brand or customer
Optional Fields
- Status: Use the status dropdown to set the campaign status
- Note: Campaigns with "Pipeline" status are hidden from talent in the Circle Club mobile app
- Inbound/Outbound Toggle: Toggle between inbound and outbound campaign types
- Campaign Tags: Use the tags selector to add relevant tags to your campaign for better organization
Tab 2: Details
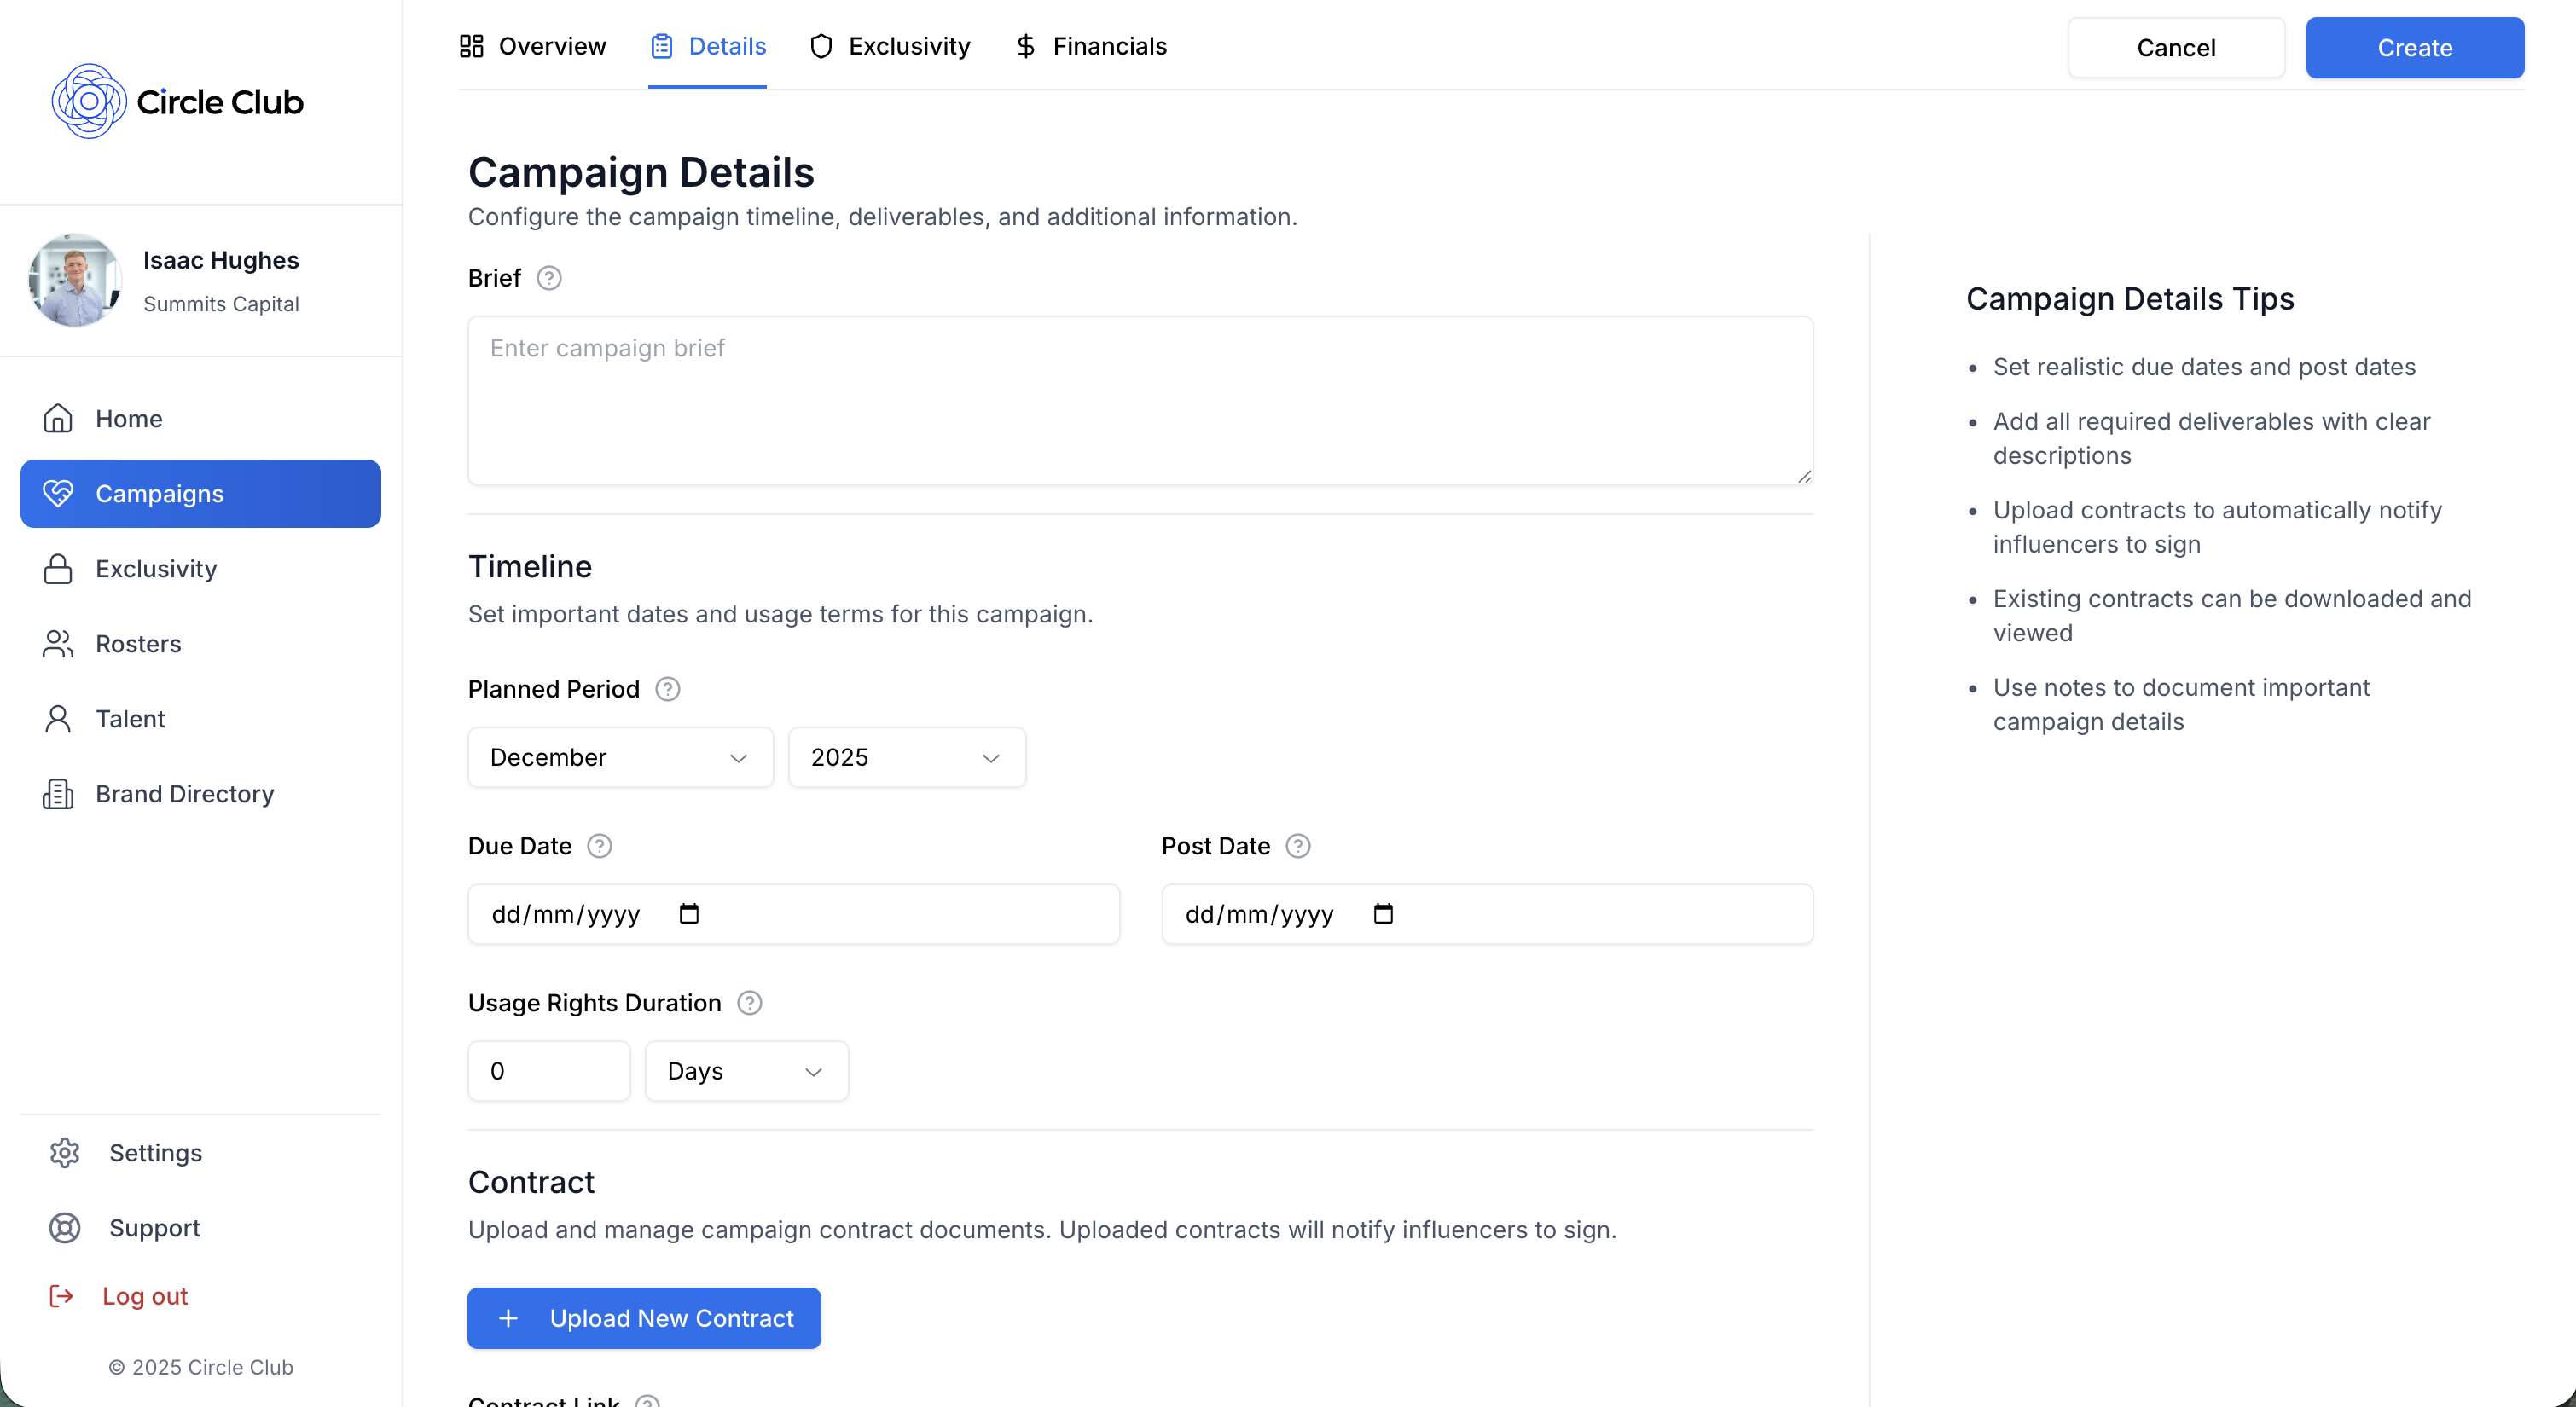
The Details tab allows you to add comprehensive information about your campaign.
Brief
- Brief Text Box: Enter a detailed brief describing the campaign objectives and requirements
Timeline Section
- Planned Period: Select the planned period for this campaign
- Due Date: Set the due date for campaign completion
- Post Date: Set the date when content should be posted
Contract Section
You can add contracts to your campaign in two ways:
- External Contract Link: Add a link to an external contract document
- Upload Contracts: Upload contracts to be signed in the app by talent
For detailed instructions on uploading and managing contracts, see our How to Upload Contracts guide.
Documents Section
Upload supporting documents related to your campaign.
For detailed instructions on uploading documents, see our How to Upload Documents guide.
Deliverables
- Deliverables Selector: Select or add the deliverables required for this campaign
Campaign Notes
- Campaign Notes Text Field: Add any additional notes or instructions for the campaign
Post Links
- Post Links Section: Add links to posts once they're published
Tab 3: Exclusivity Management
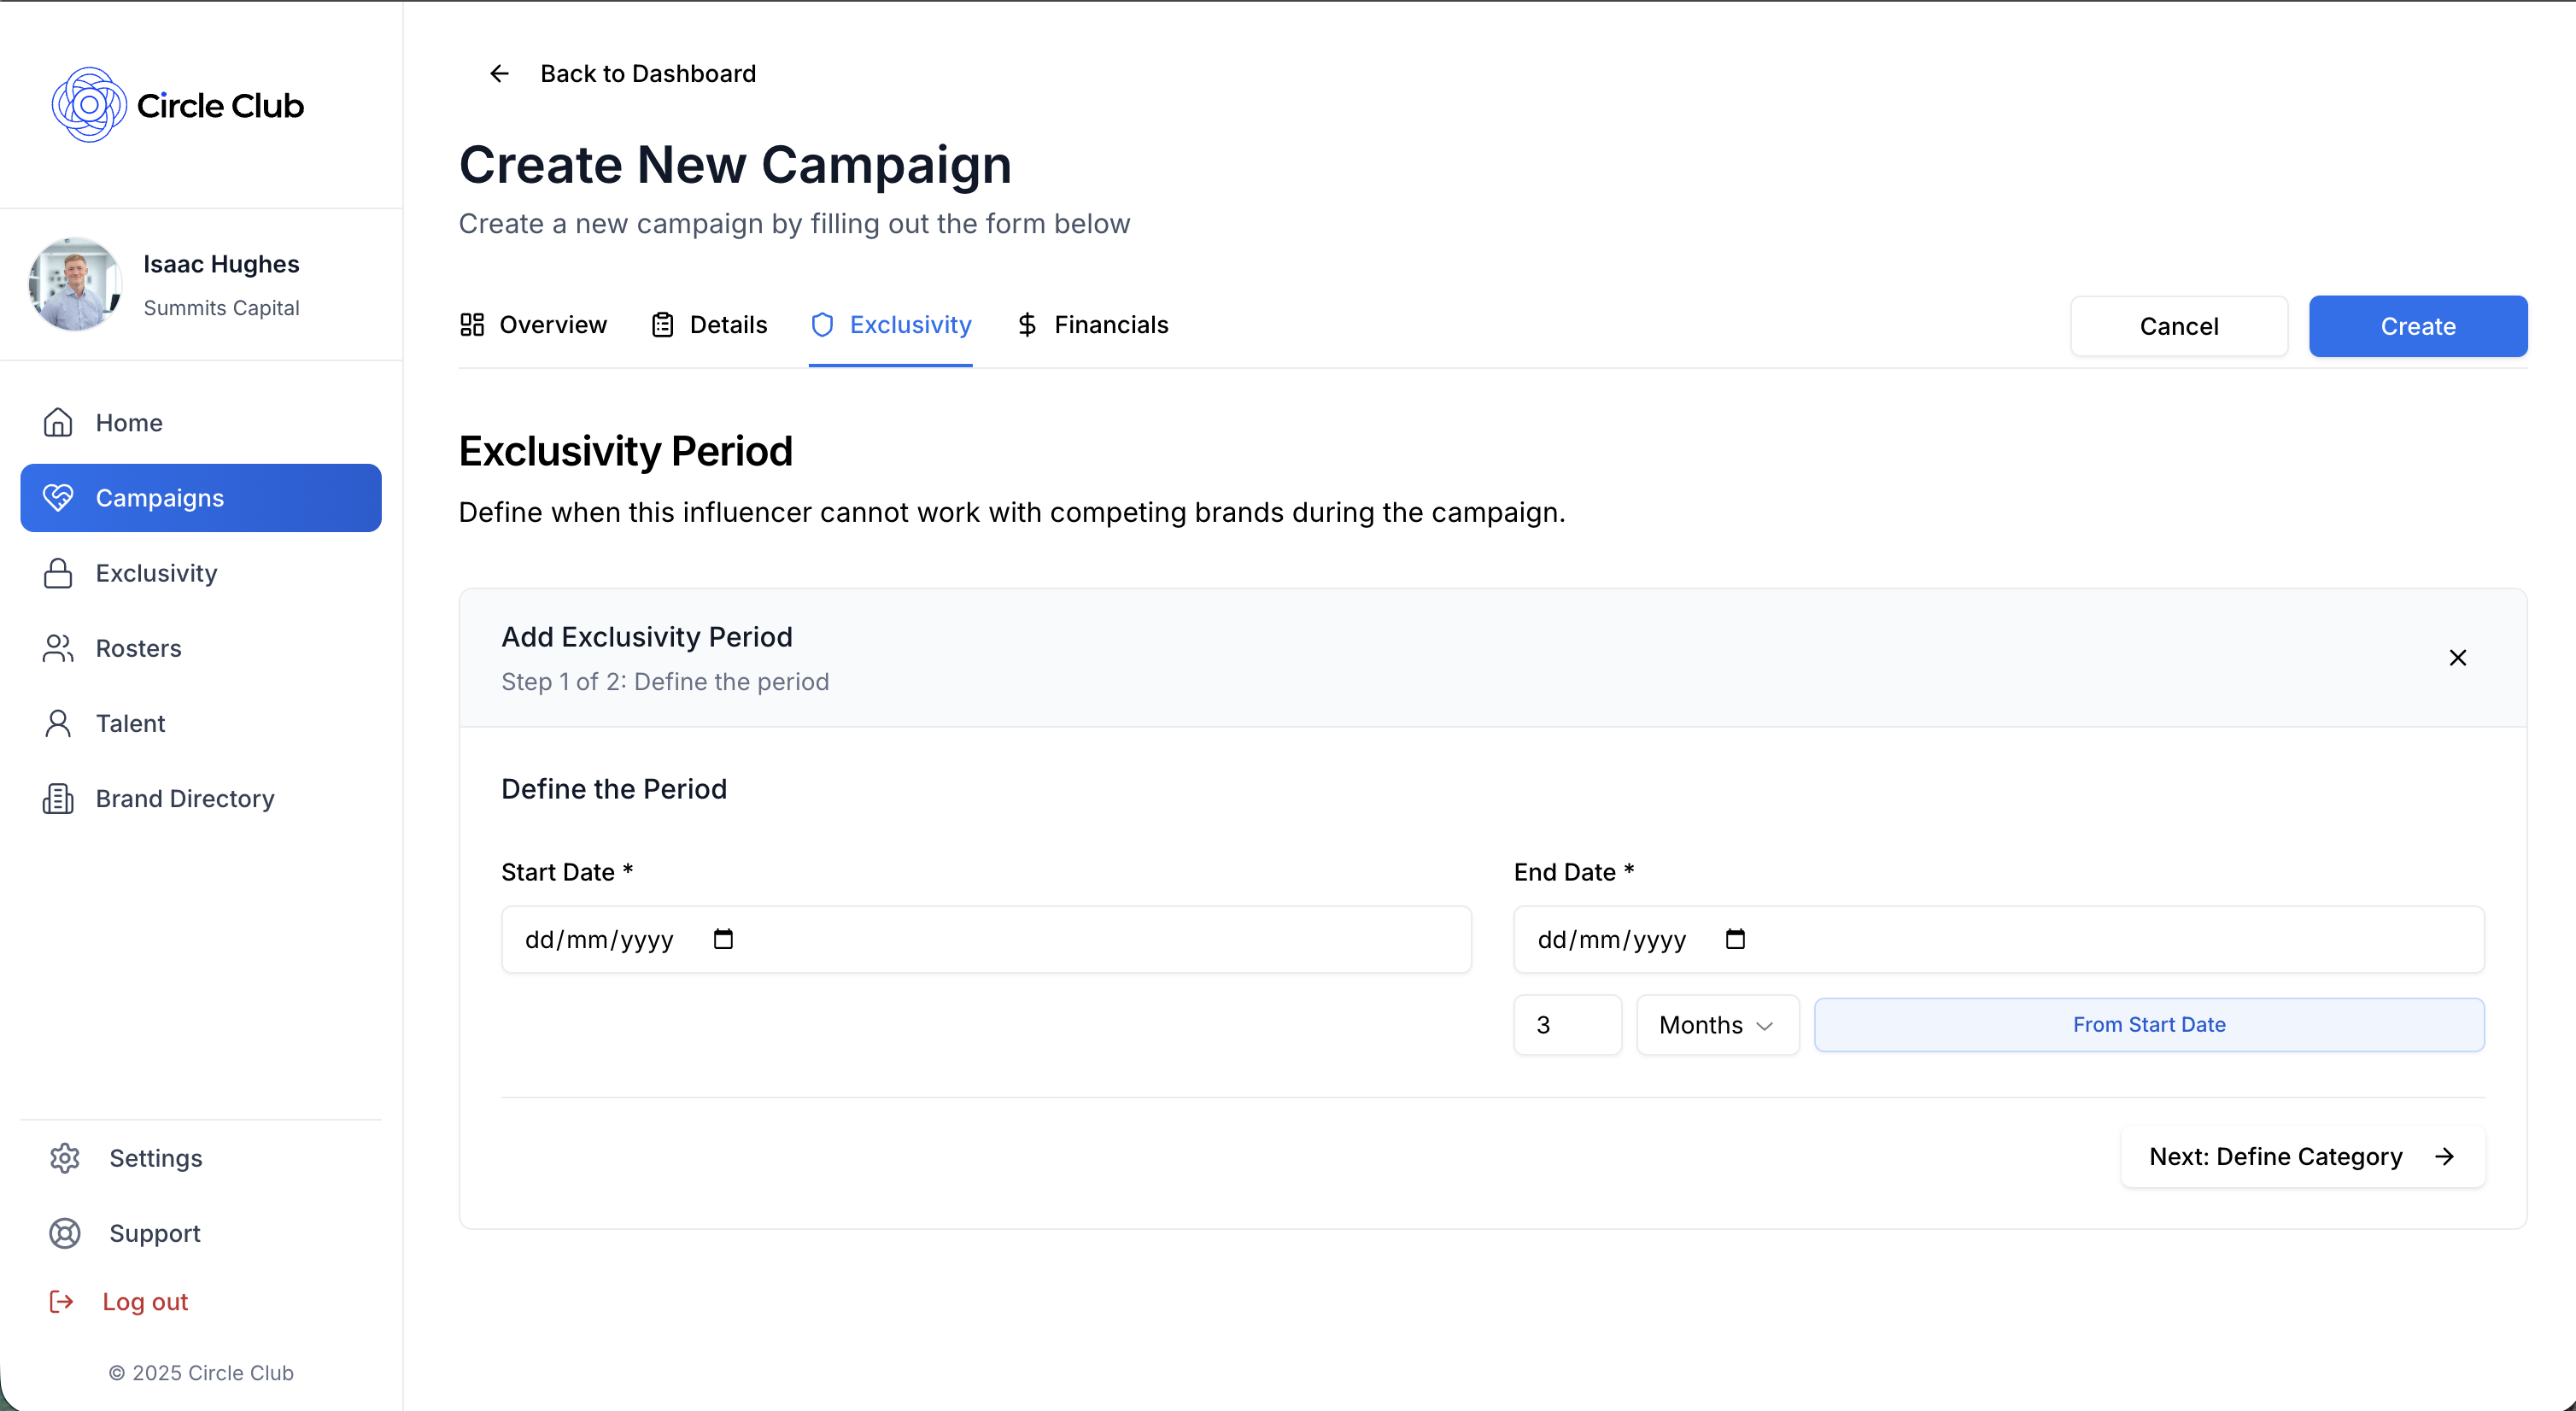
The Exclusivity Management tab allows talent managers to define exclusivity periods for the campaign.
Setting Up Exclusivity
-
Select Dates:
- Start Date: Choose when the exclusivity period begins
- End Date: Choose when the exclusivity period ends
- Quick Date Functionality: Use quick date options to auto-fill the end date (e.g., "3 months from start date")
-
Configure Exclusivity Details:
- Category Name: Select a category name for the exclusivity period
- Description: Add a description of the exclusivity requirements
- Color: Select a color to visually identify this exclusivity period
- Period Notes: Add any additional notes about the exclusivity period
-
Save: Click "Save Exclusivity" to add the exclusivity period to the campaign
You can add multiple exclusivity periods to a single campaign by repeating these steps.
Tab 4: Financials
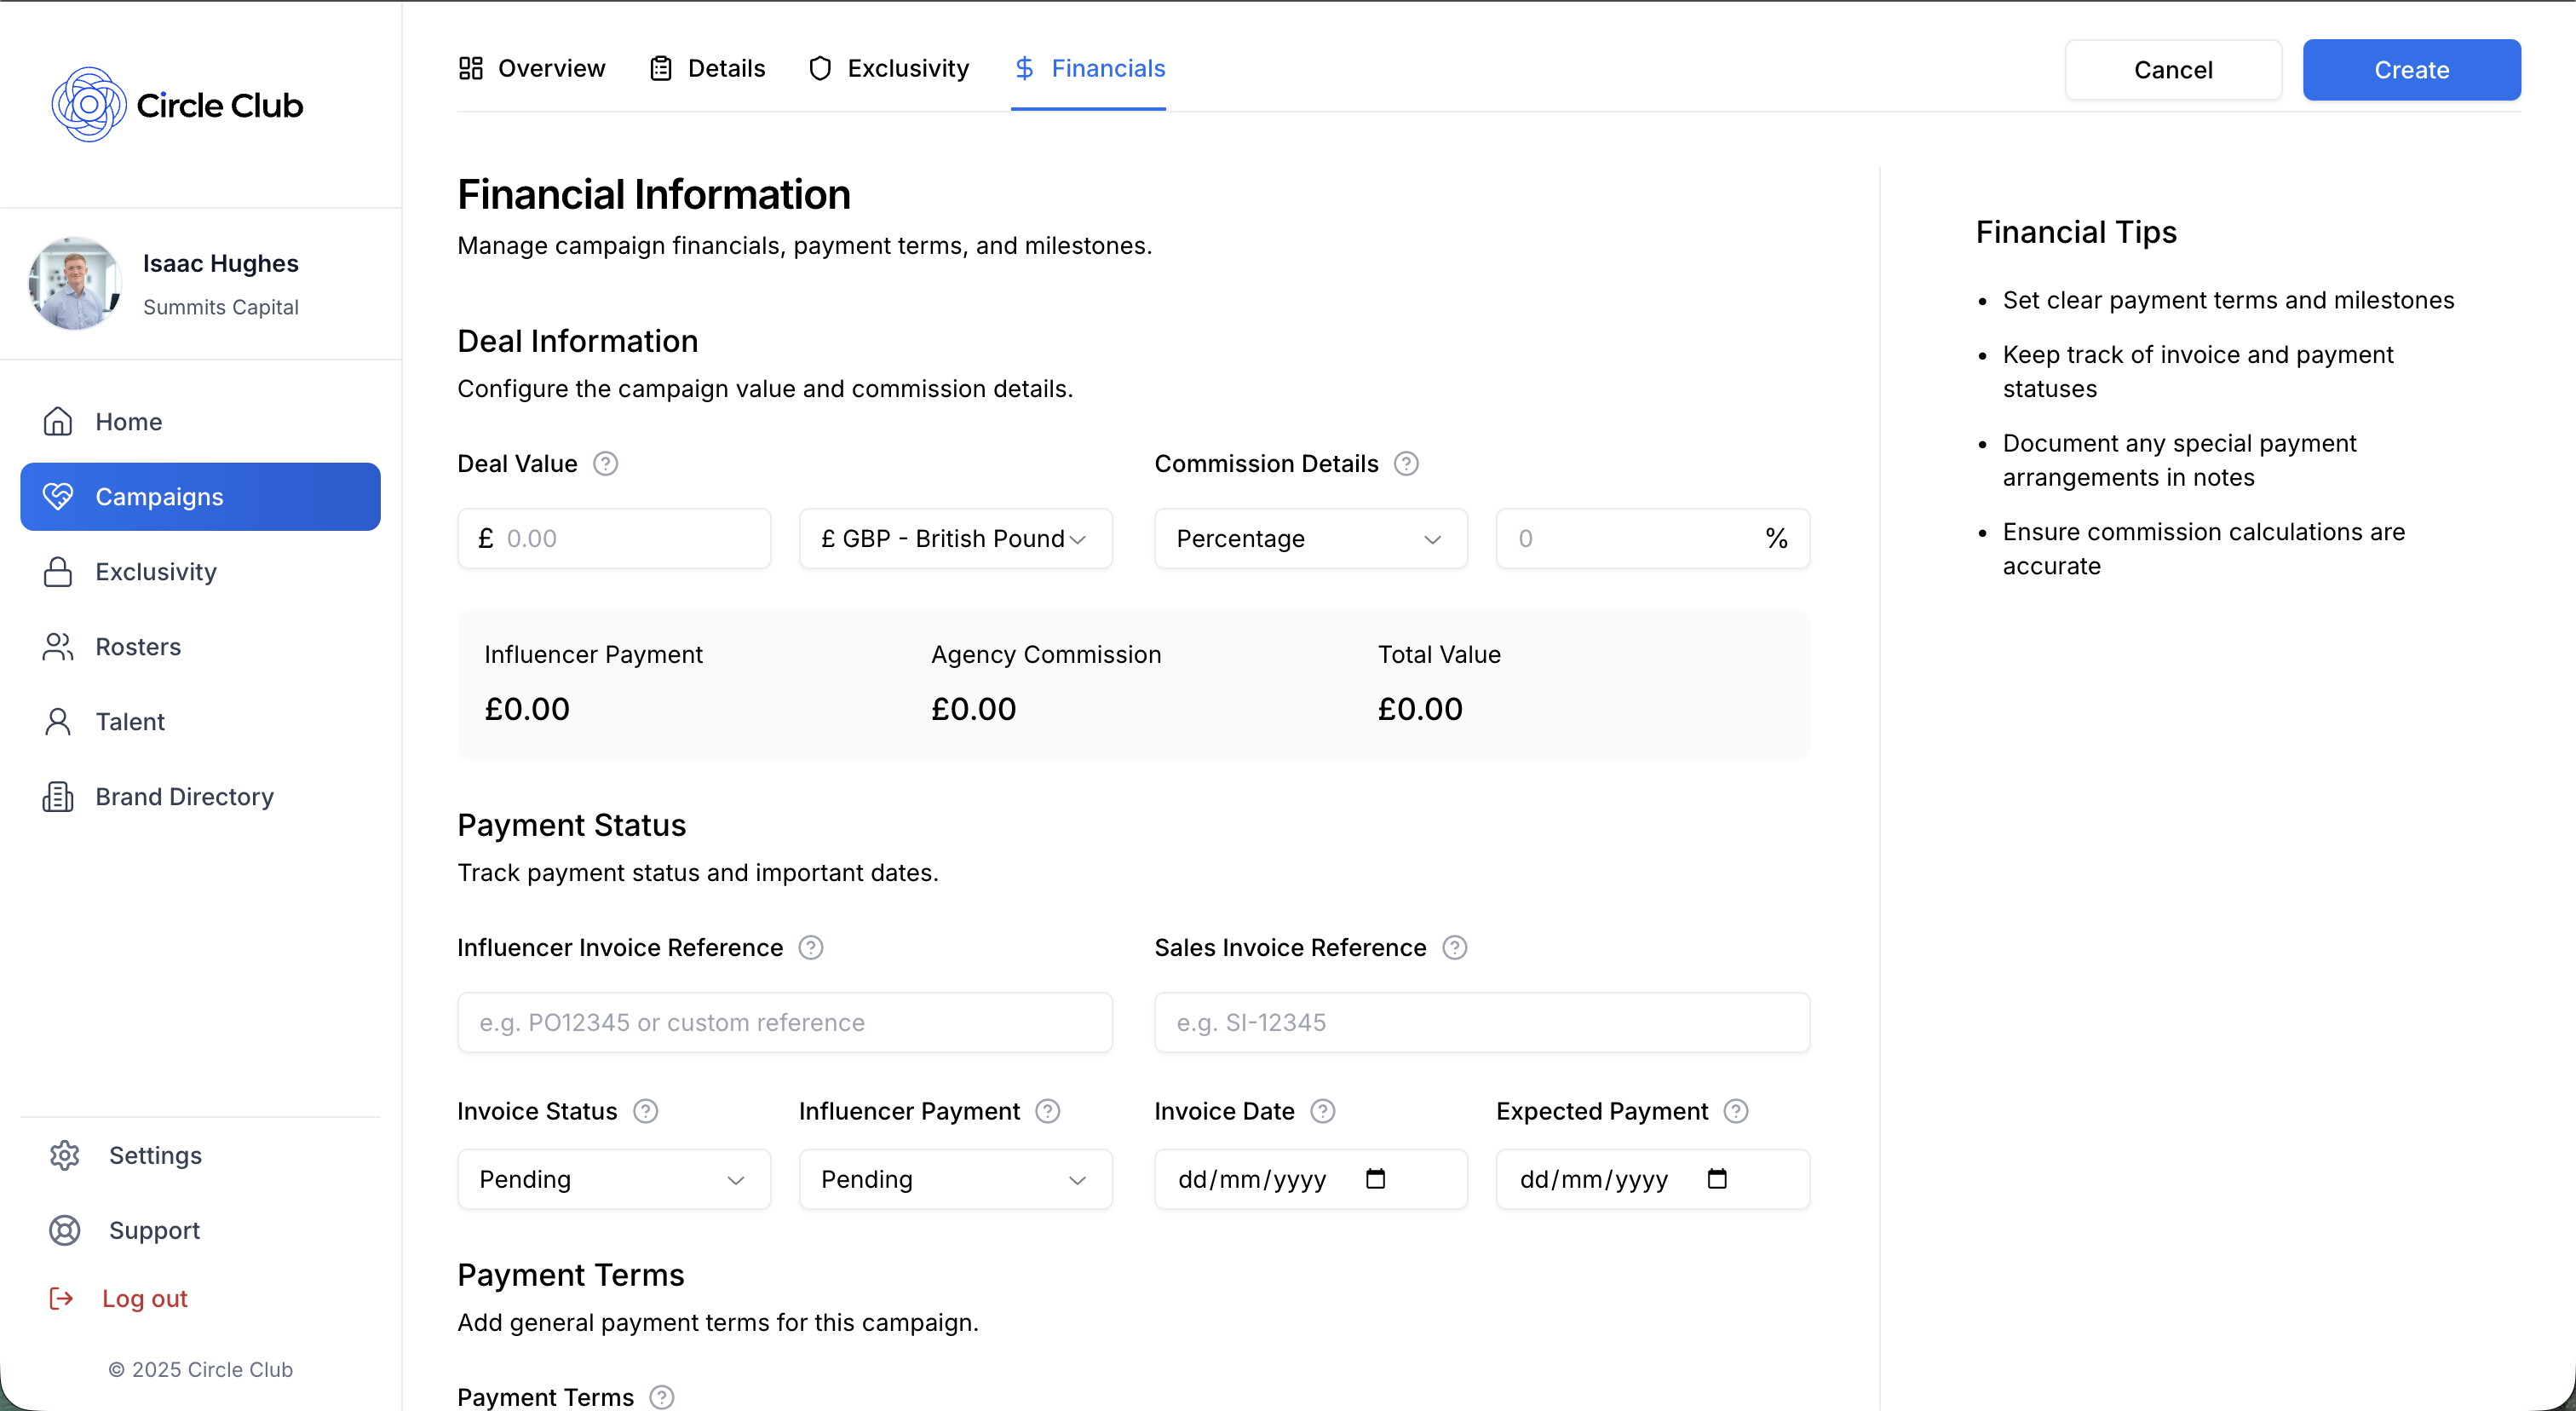
The Financials tab handles all payment and commission information for the campaign.
Deal Information
- Deal Value: Enter the total deal value for the campaign
- Currency: Select the currency for the deal value
Commission
- Commission Type: Choose between:
- Fixed Value: Enter a fixed commission amount
- Percentage: Enter a commission percentage
- Commission Value: Enter the commission value based on your selected type
- Breakdown: View the commission breakdown displayed below the input fields
Payment Status Section
Track payment information and invoice details:
- Influencer Invoice Reference: Enter the reference for the invoice the agency receives from the influencer
- Sales Invoice Reference: Enter the reference for the invoice sent to the customer
- Invoice Status: Select the current invoice status:
- Pending
- Sent
- Paid
- Overdue
- Influencer Payment Status: Track the payment status for the influencer
- Invoice Date: Set the invoice date
- Expected Payment Date: Set when payment is expected
- Payment Terms: Enter payment terms in the text field
Payment Milestones
Add multiple payment milestones to track progress:
- Description: Describe what the milestone represents
- Due Date: Set when the milestone payment is due
- Status: Track the status of each milestone
You can add multiple milestones by clicking the add button and filling in the details for each one.
Additional Payment Notes
- Payment Notes Text Field: Add any additional notes or information about payments
Summary
Creating a campaign in Circle Club involves:
- Overview Tab (Required): Add title, influencer, managing agent, and brand/customer
- Details Tab: Add brief, timeline, contracts, documents, deliverables, notes, and post links
- Exclusivity Management Tab: Define exclusivity periods with dates, categories, and descriptions
- Financials Tab: Set deal value, commission, payment status, milestones, and payment notes
Once you've completed the required fields in the Overview tab, you can save your campaign. You can always return to add more details across the other tabs later.
Related Demos
How to Add Talent to Your Agency
Learn all the ways to add influencers to your agency in Circle Club — including invites, join codes, and accepting applications.
How to Create a Roster
Learn how to create and manage your talent roster in Circle Club. This guide will walk you through the four-tab creation process step by step.
How to Upload Contracts
Learn how to upload and manage contracts for campaigns in Circle Club, including uploading contracts for talent to sign in-app.