How to Create a Roster
How to Create a Roster
Rosters help you organize and manage your talent effectively. This guide walks you through creating a roster using the four-tab creation flow in Circle Club.
Getting Started
- Navigate to Rosters
- Click the "New Roster" button in the top-right corner
This opens the roster creation page with four tabs. To create a roster, you'll need to complete at minimum the Details tab.
Tab 1: Details
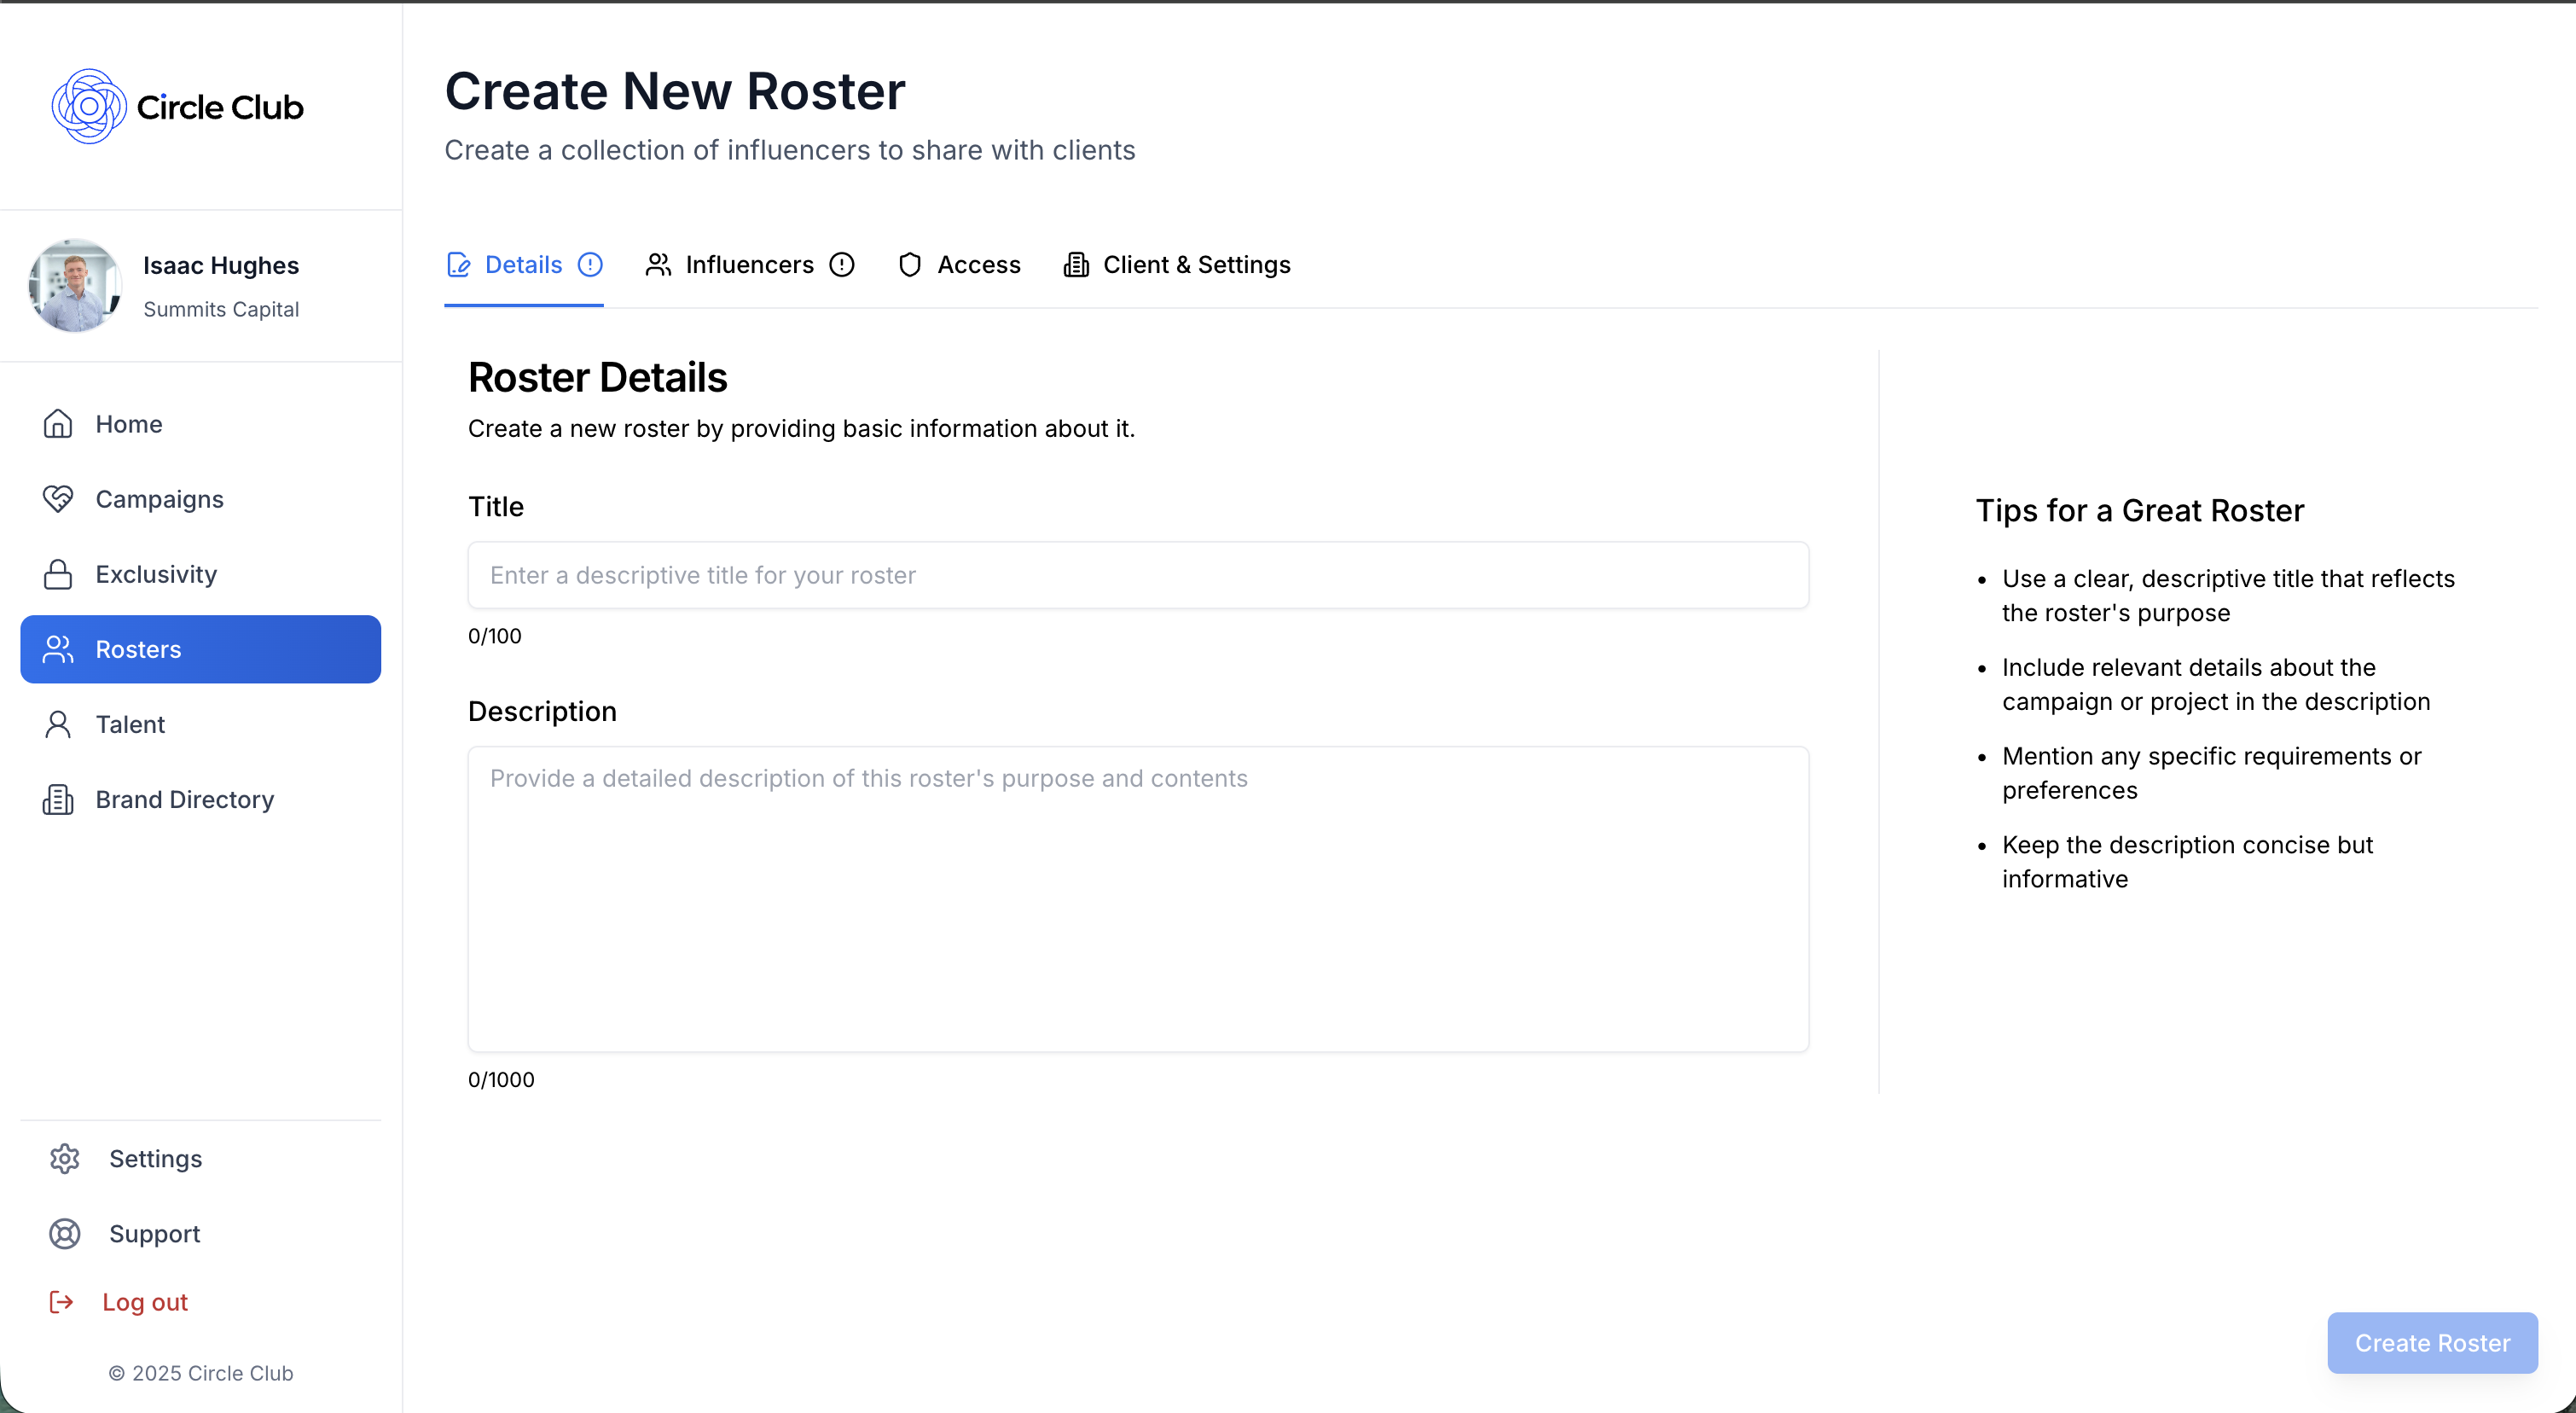
The Details tab contains the essential information for your roster.
Required Fields
- Title: Enter a descriptive name for your roster (e.g., "Q1 2025 Talent")
- Description: Add a brief description of what this roster is for
Tab 2: Influencers
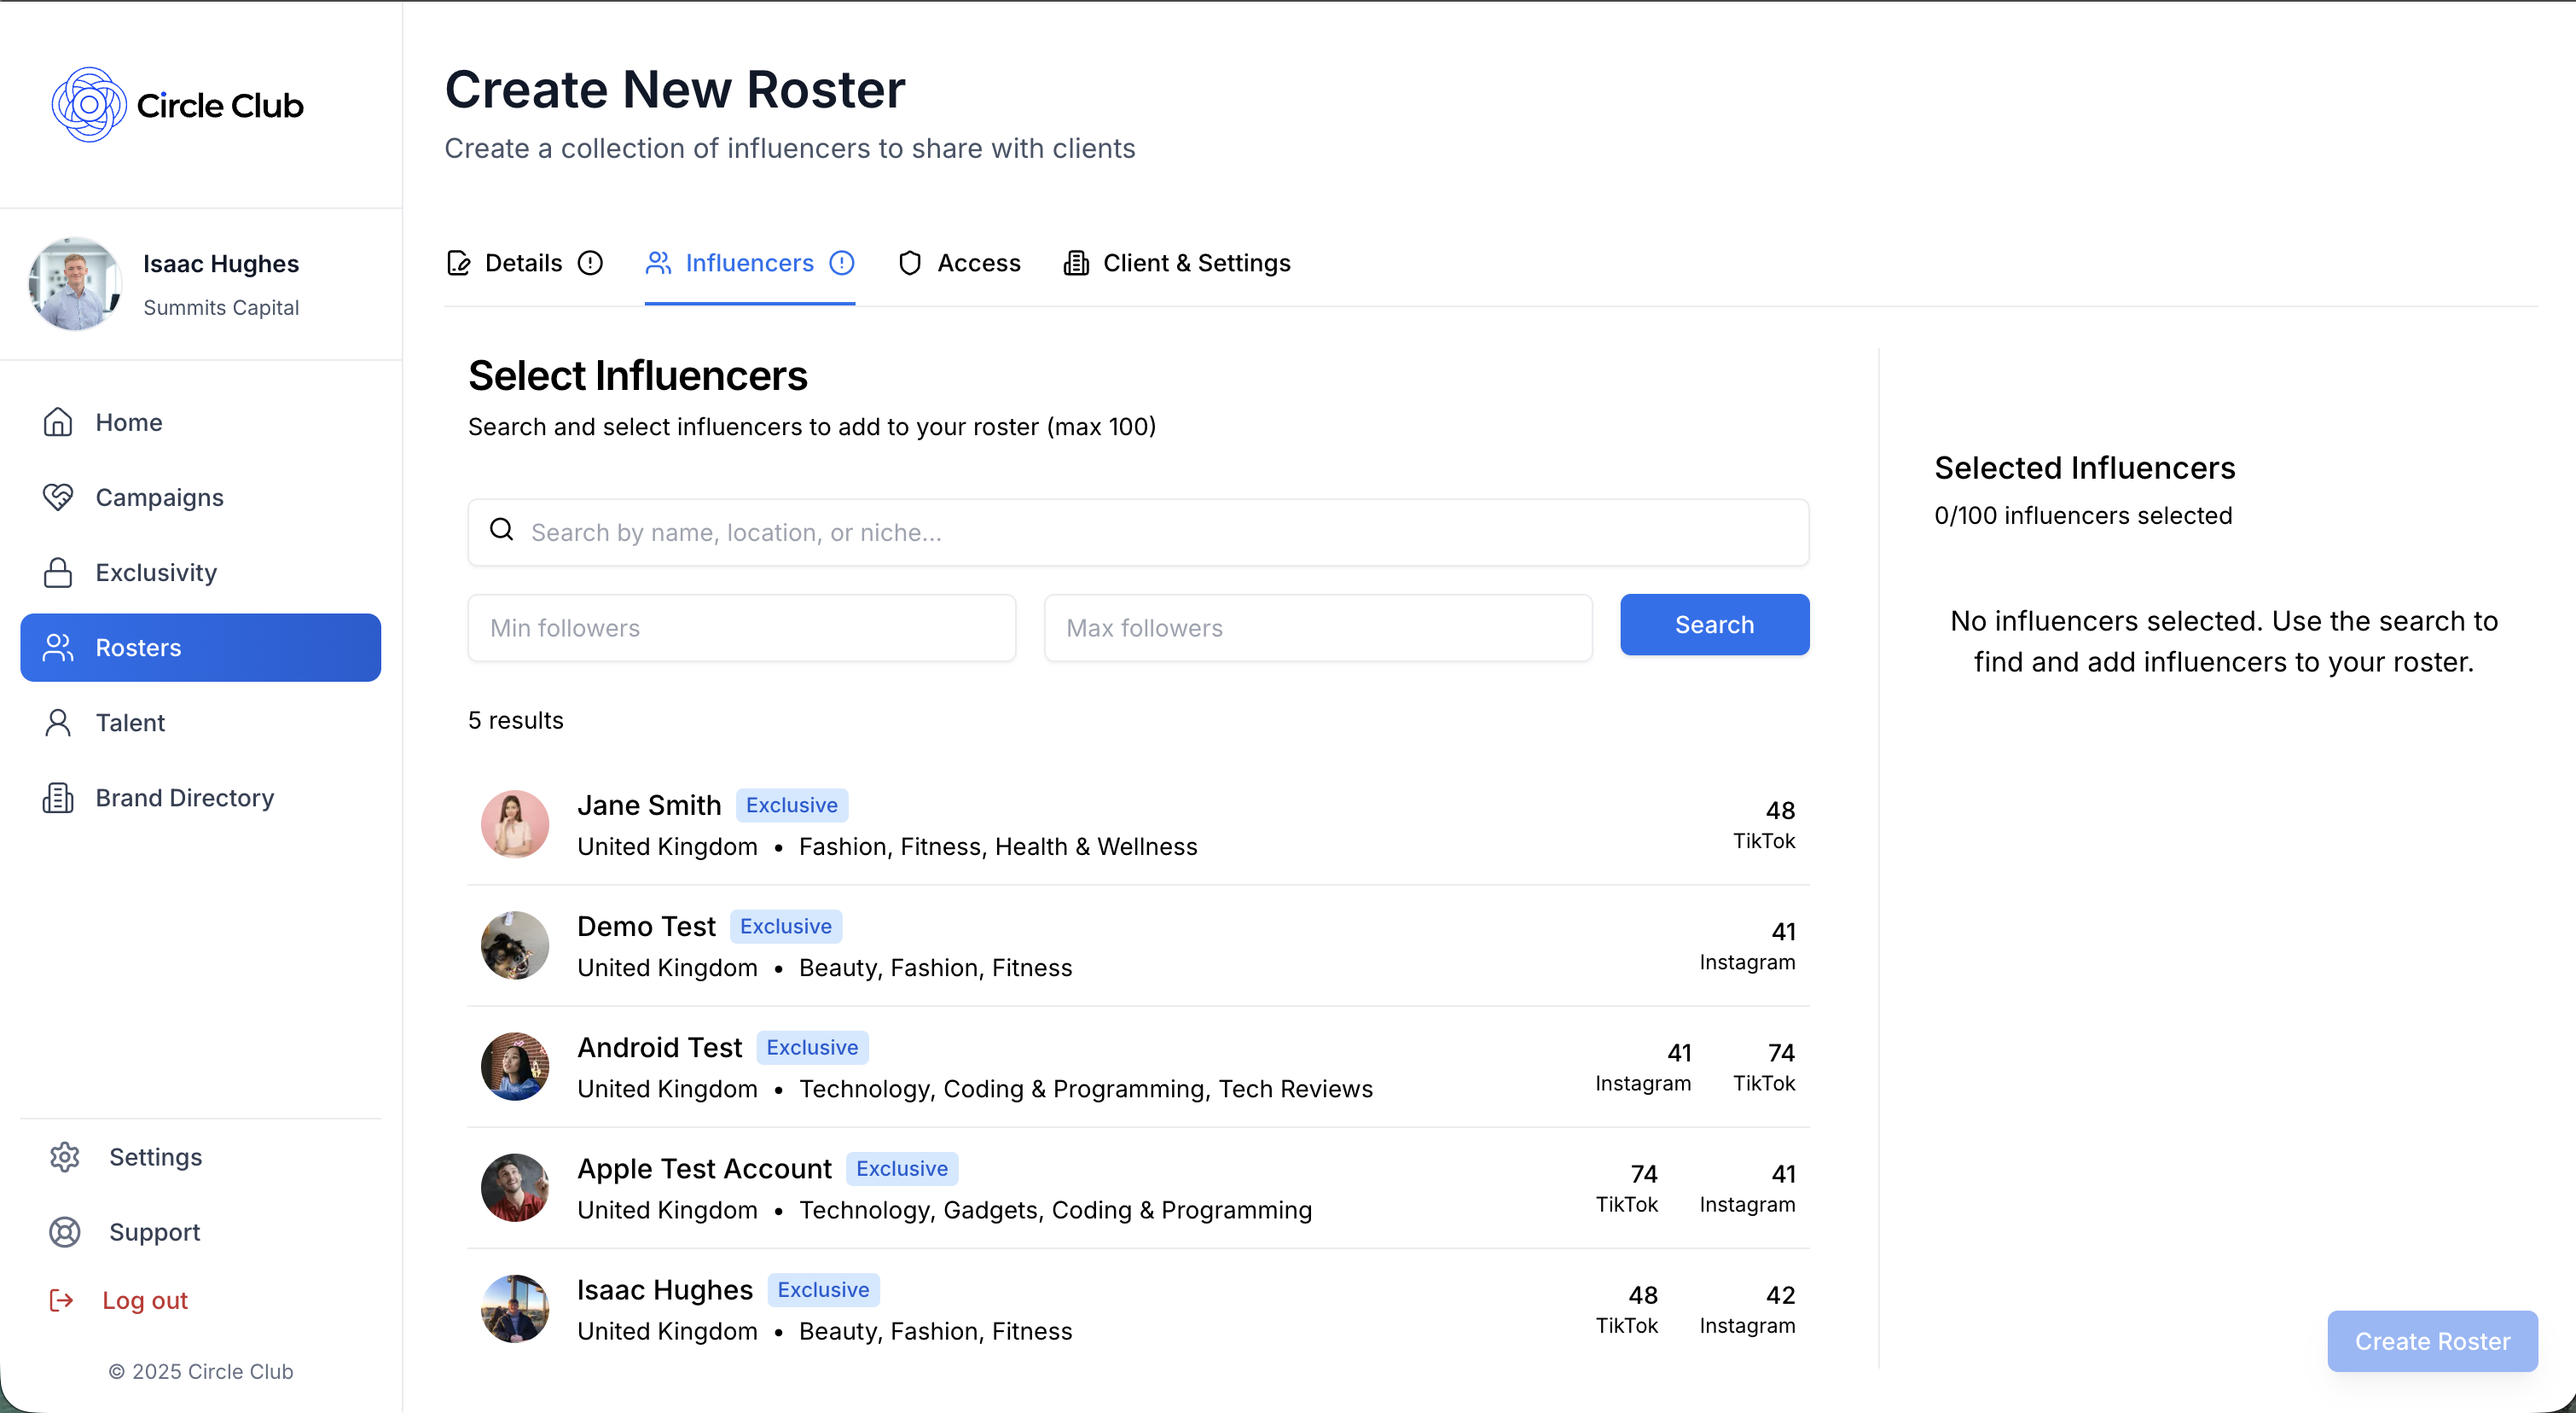
The Influencers tab allows you to add talent to your roster.
- Search Influencers: Use the search functionality to find influencers you want to add
- Add to Roster: Click on an influencer to add them to the roster
You can add multiple influencers by repeating this process. The selected influencers will appear in your roster.
Tab 3: Access
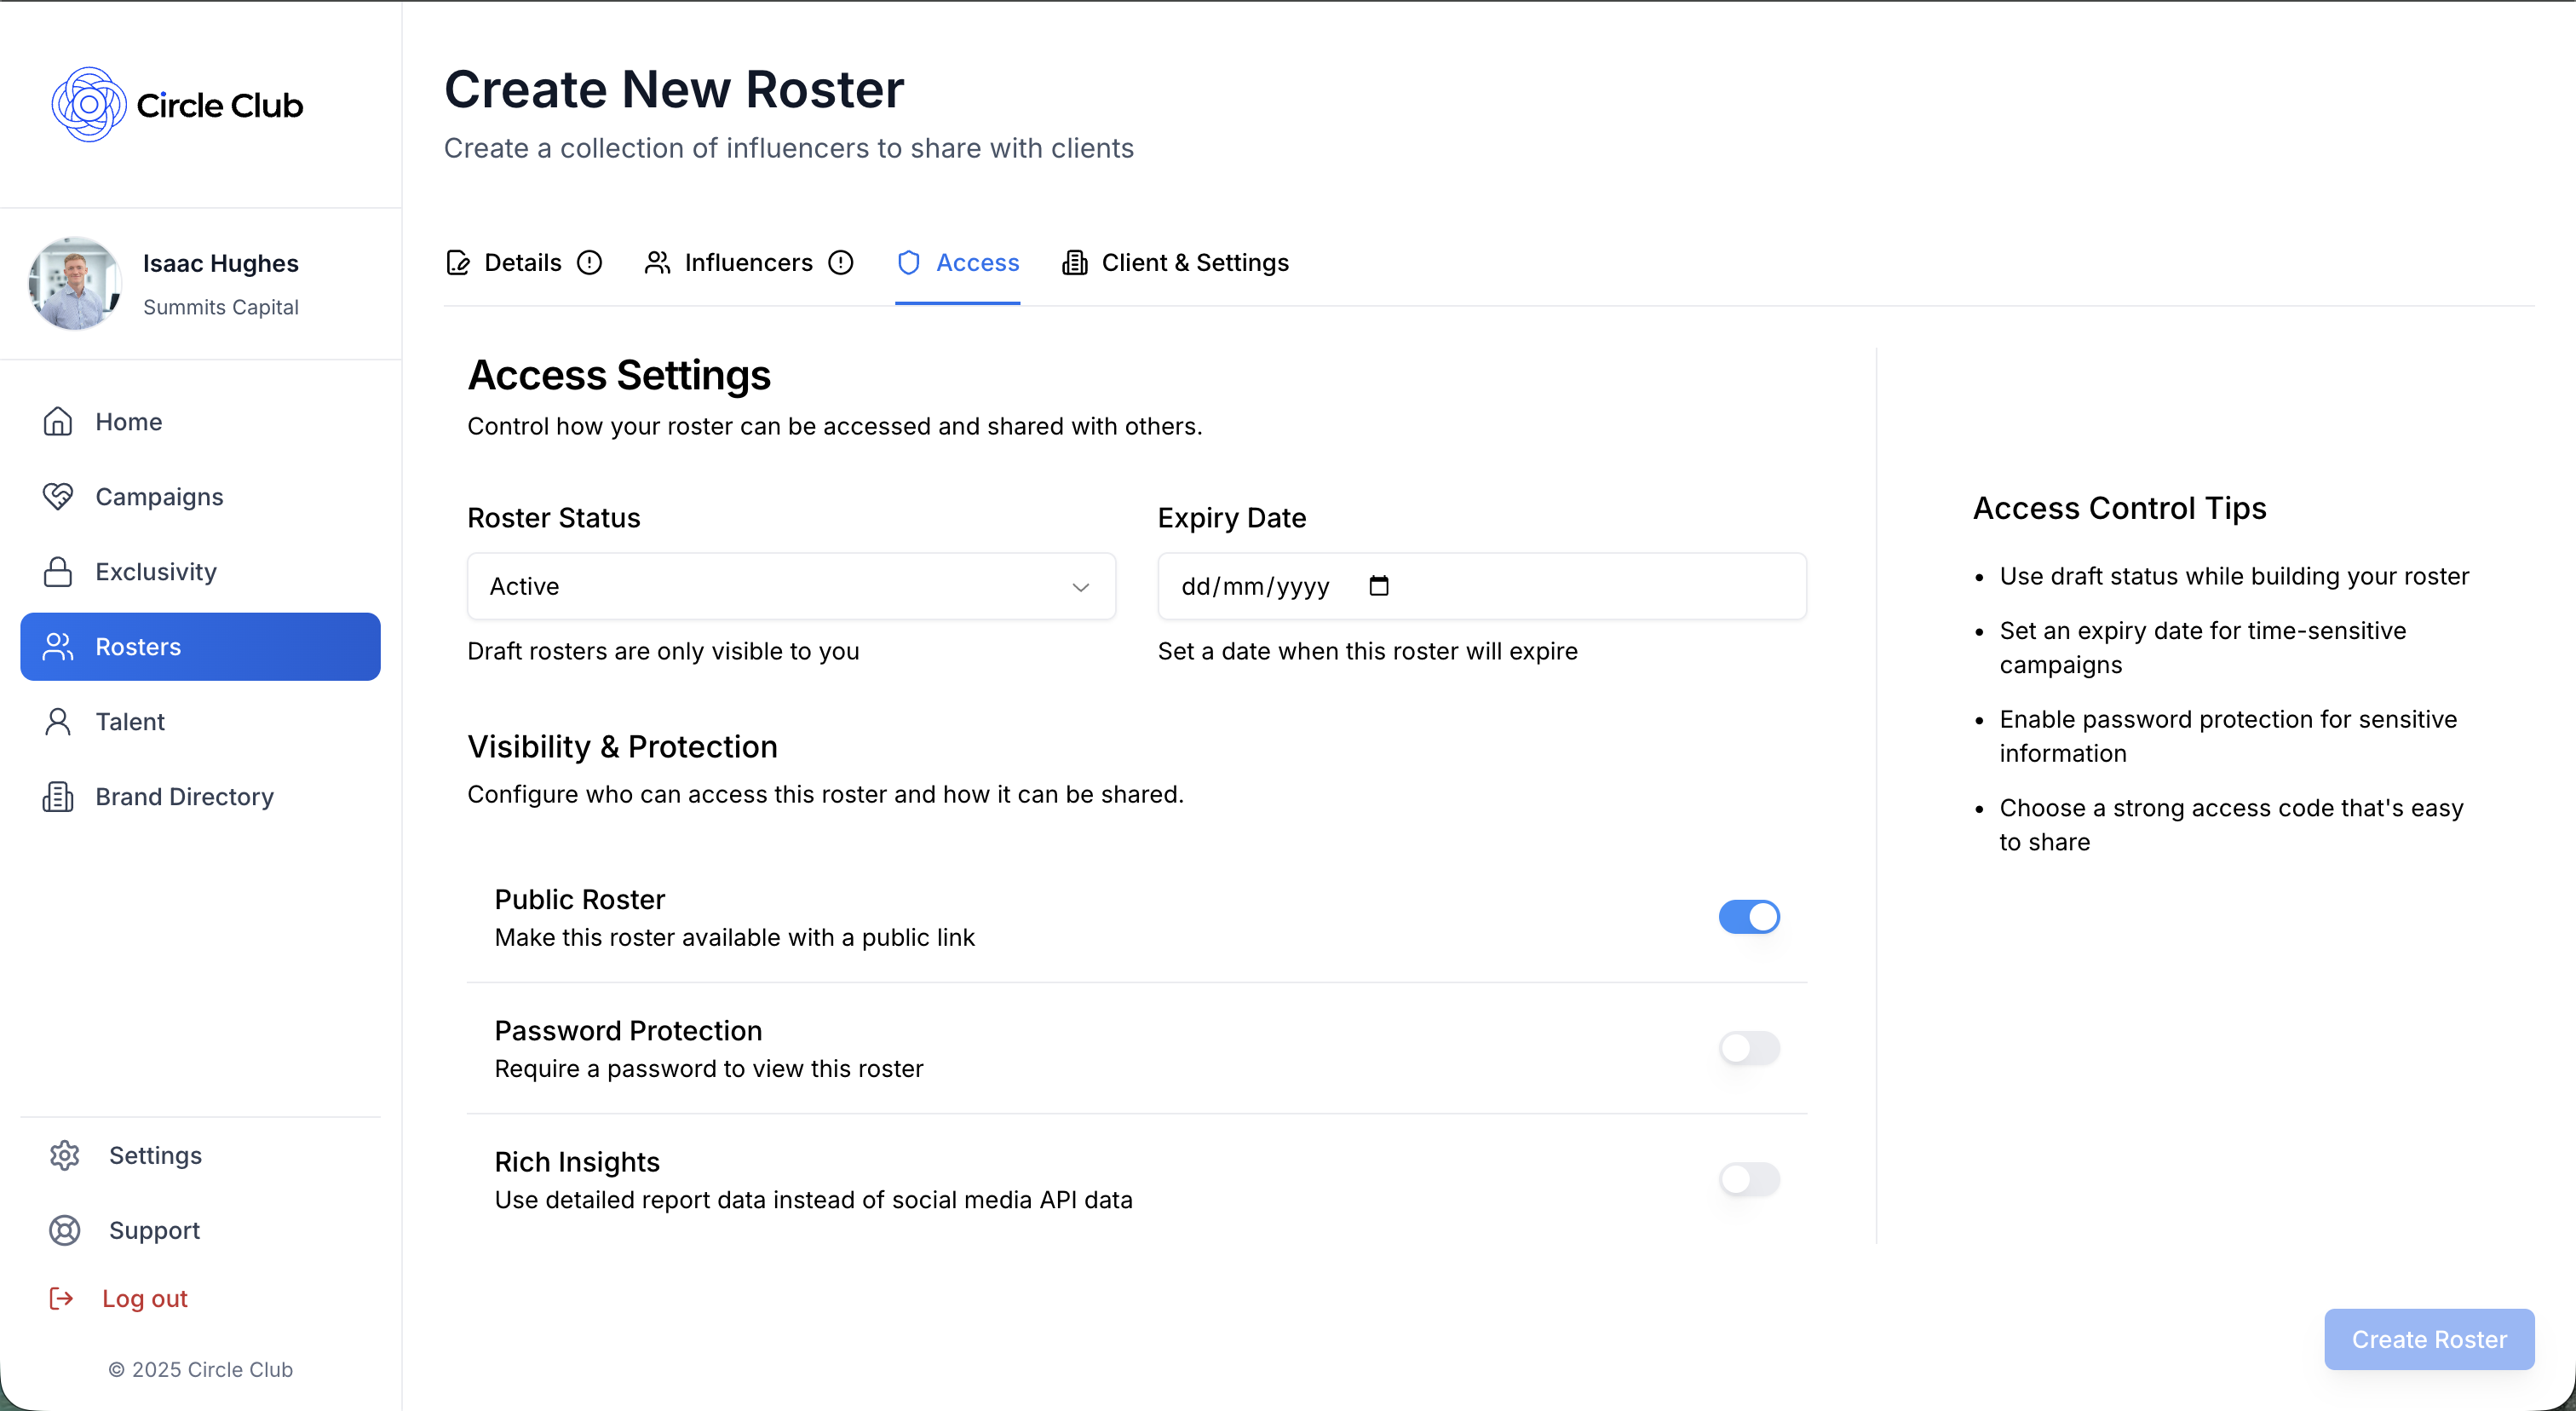
The Access tab lets you configure who can access the roster and how it's displayed.
Roster Status
Select the status of your roster:
- Active: The roster is currently active and accessible
- Draft: The roster is in draft mode
- Archived: The roster is archived
- Disabled: The roster is disabled and not accessible
Expiry Date
- Expiry Date (Optional): Set an expiry date if you wish. When this date is reached, the roster becomes inaccessible.
Access Settings
Configure access controls with these toggles:
- Public Roster: Toggle to make the roster publicly accessible
- Password Protection: Toggle to require a password for roster access
- Rich Insights: Toggle to control how much data is available about the influencers on the roster
Tab 4: Client and Settings
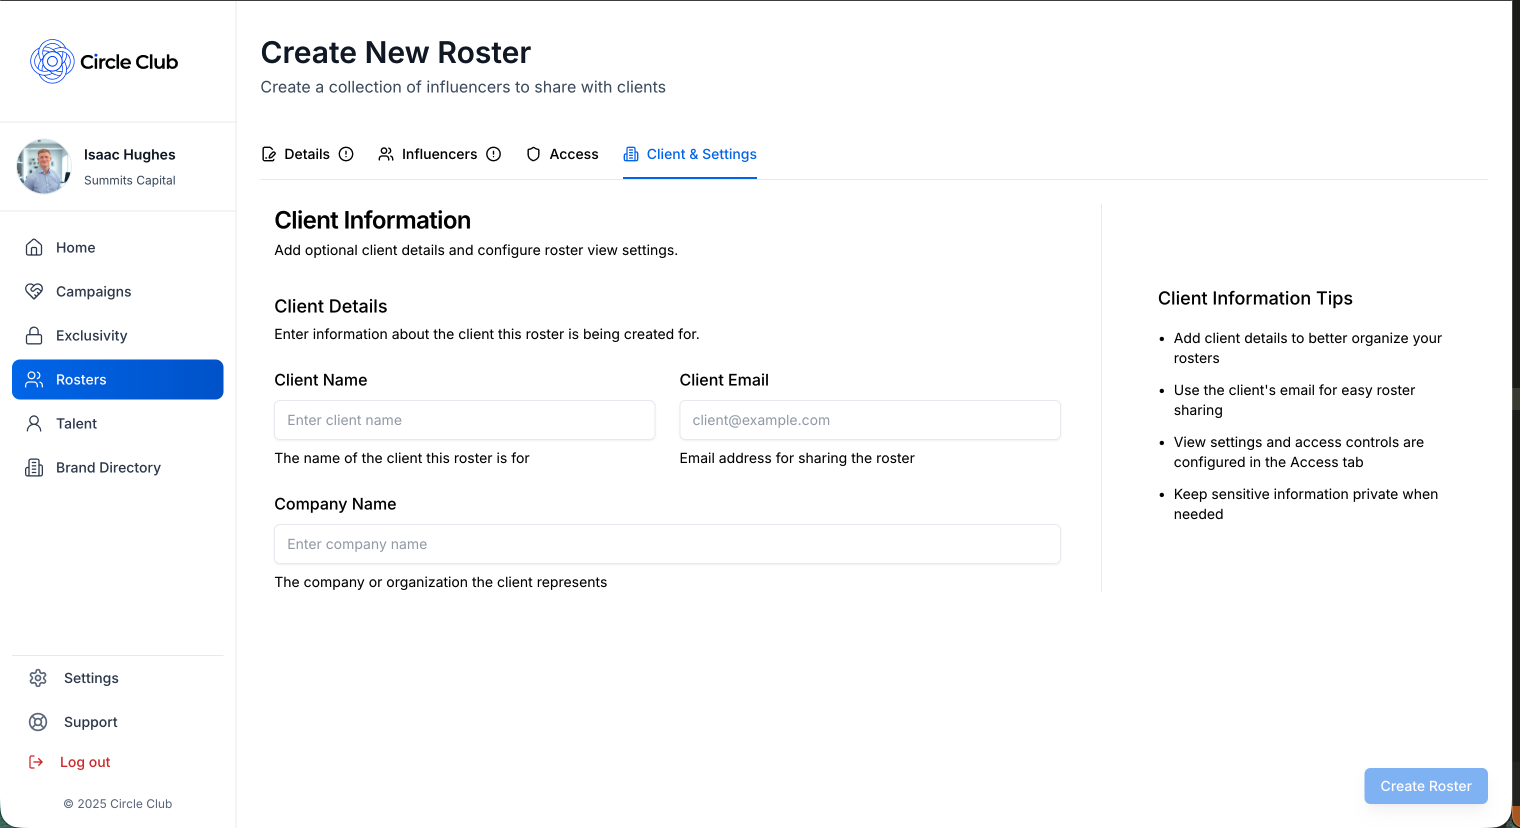
The Client and Settings tab allows you to associate client information with your roster.
Optional Client Information
- Client Name: Enter the name of the client
- Email: Enter the client's email address
- Company Name: Enter the client's company name
All fields in this tab are optional. You can create a roster without filling in any client information.
Creating Your Roster
Once you've completed the required fields in the Details tab (and optionally added information to the other tabs), click the "Create Roster" button in the bottom-right corner to create your new roster.
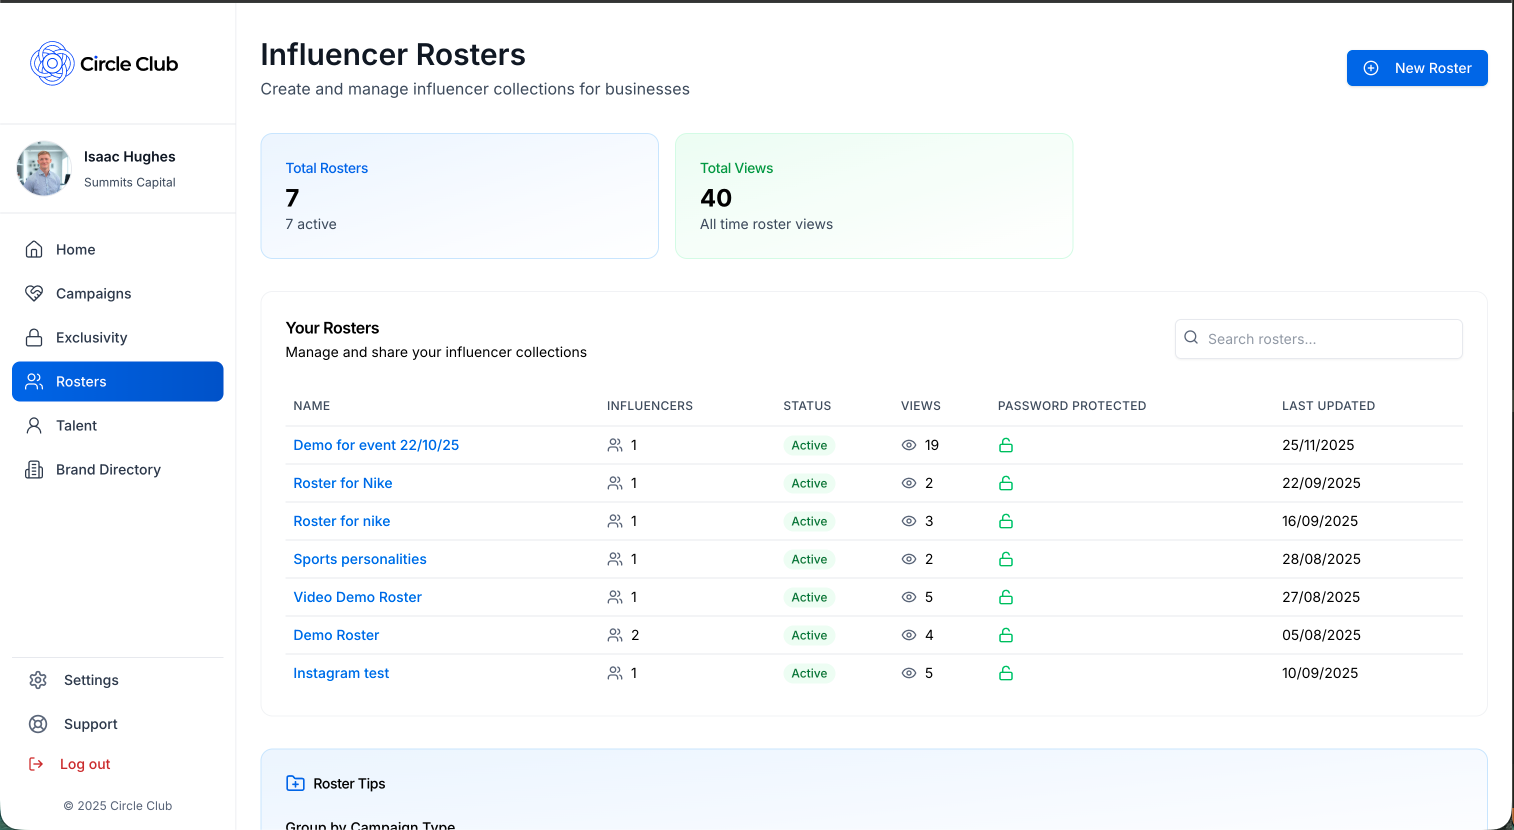
Managing Your Roster
After creating a roster, you can manage it from the Rosters page:
- View Your Roster: Click on the roster from the rosters page to open the Manage Roster screen
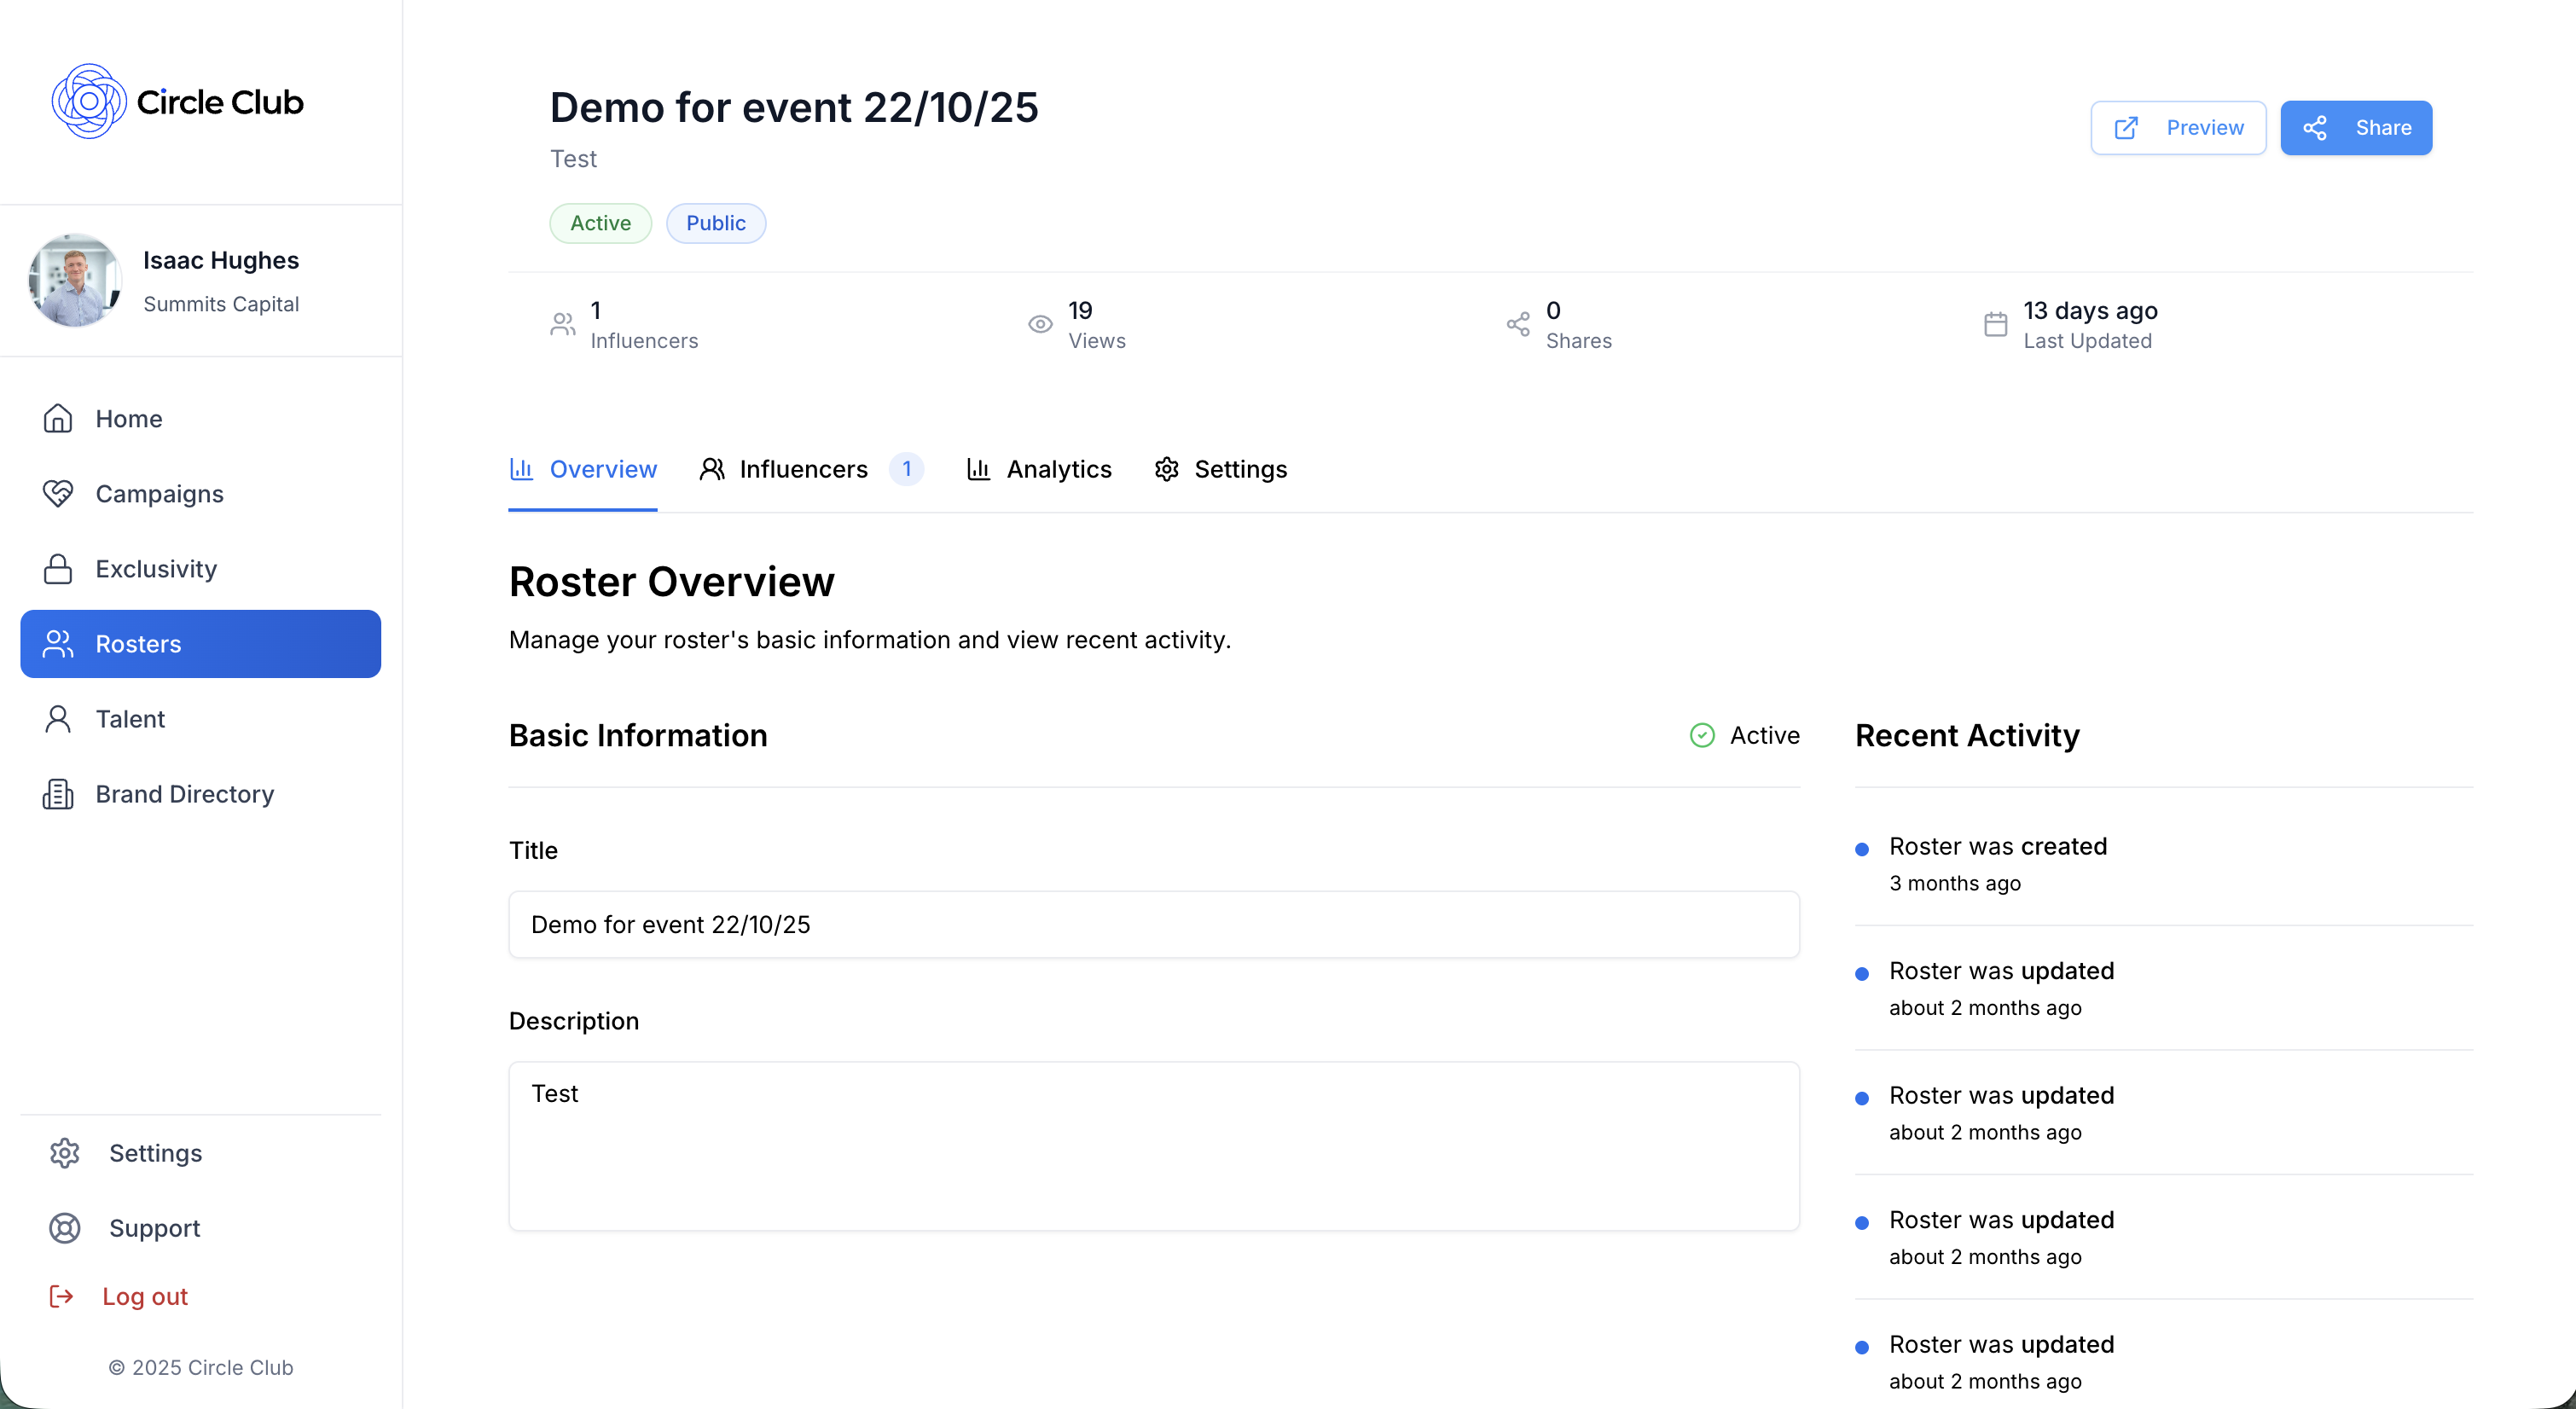
- View Stats: Access statistics and insights about your roster
- Access the Link: Get the shareable link for your roster
- Update the Roster: Make changes to roster details, add or remove influencers, and update settings
Summary
Creating a roster in Circle Club involves:
- Details Tab (Required): Add title and description
- Influencers Tab: Search and add influencers to the roster
- Access Tab: Configure status, expiry date, and access settings (public, password protection, rich insights)
- Client and Settings Tab (Optional): Add client name, email, and company name
Once you've completed the required fields, click "Create Roster" to finalize. You can always return to manage and update your roster later from the Manage Roster screen.
Related Demos
How to Add Talent to Your Agency
Learn all the ways to add influencers to your agency in Circle Club — including invites, join codes, and accepting applications.
How to Create a Campaign
Learn how to create a campaign in Circle Club with step-by-step instructions for all four tabs: Overview, Details, Exclusivity Management, and Financials.